 English
 Swedish
DS records (Delegation Signer) are a critical component in DNSSEC (Domain Name System Security Extensions), which enhances the security of the DNS system by protecting against various types of attacks. Here is a step-by-step guide on how to manage DS records with us:
Step 1: Log in to your account
- Login Page: Visit our customer area to get started.
- Log In: Enter your login credentials to log in to your account.
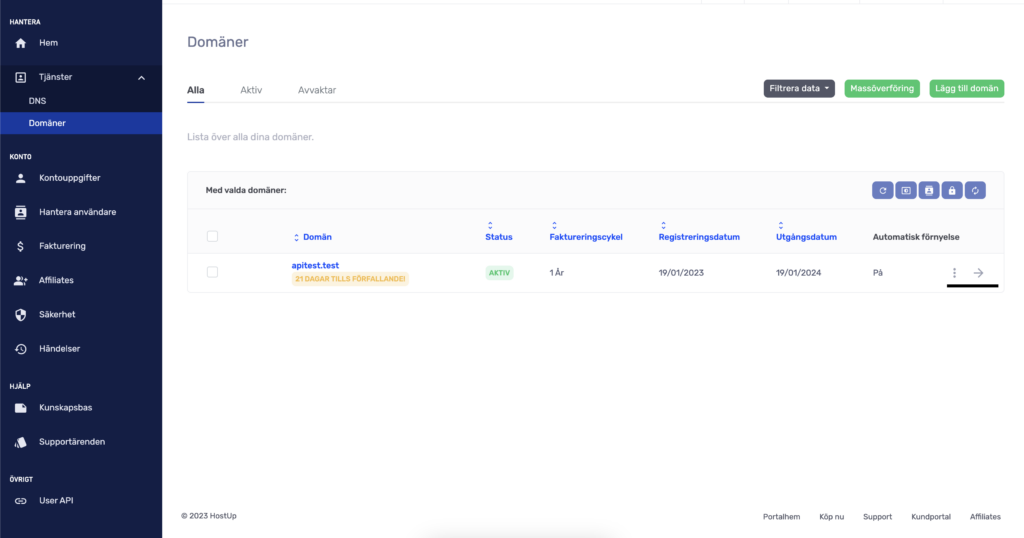
Step 2: Navigate to your domain name
- Customer Portal: In your customer portal, click on “Services > Domains” on the left side of the navigation bar.
- Select Domain: Click on the domain name you want to manage DS records for.
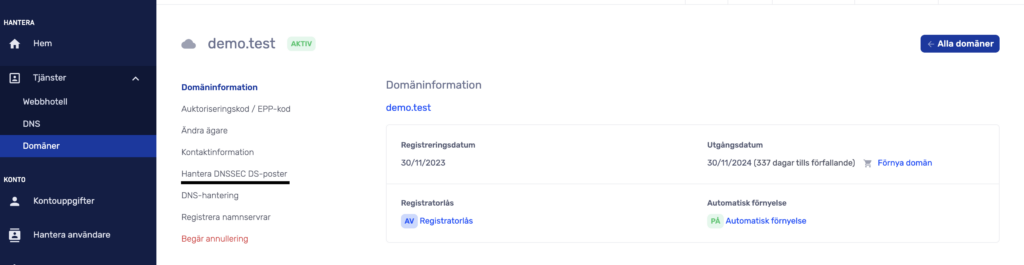
Step 3: Manage DS Records
- Automatic Activation: If you are using our name servers, we will automatically activate DNSSEC for you.
- Manual Management: However, if you are using your own name servers, you need to add the DS records yourself. Click on “Manage DNSSEC DS Records” on the left side to access the correct settings.
- Add, Edit, or Remove: Here you can add new DS records, edit existing ones, or remove them as needed.
Step 4: Enter DS Record Information
- Necessary Information: To add a DS record, you need to fill in details such as Key Tag, Algorithm, Digest Type, and Digest, which you will receive from your DNSSEC provider.
- Accuracy is Important: Be sure to enter the correct information to ensure your domain continues to function on the internet. Our system will verify that the DS record is in the correct format. It may be helpful to change the language settings to English.
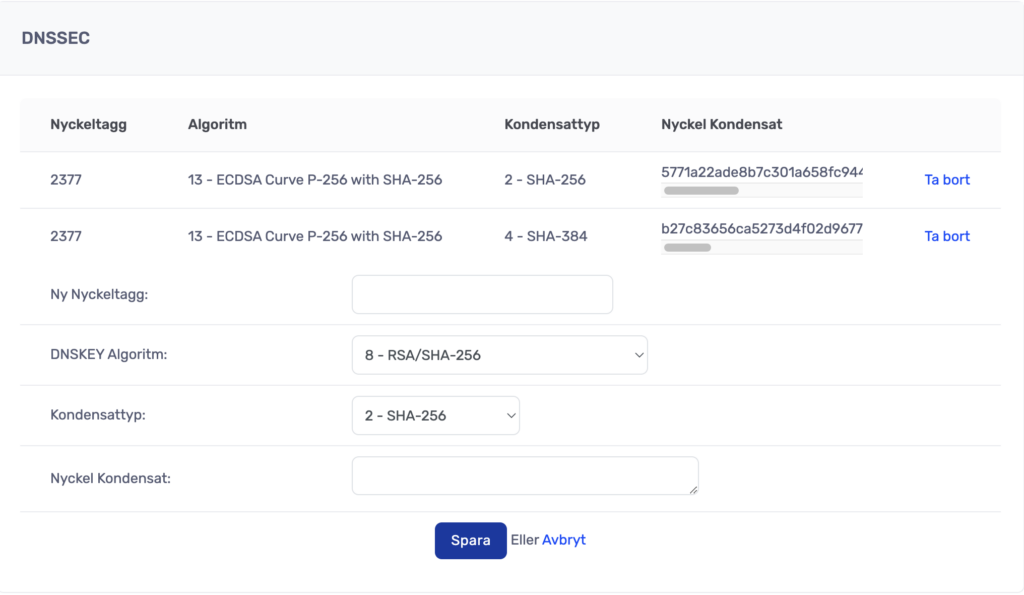
- Confirm Changes: Once you have added or modified a DS record, make sure to save your changes.
Was this article helpful?
Tack för din feedback!