 English
 Swedish
With us, you can upgrade the storage capacity of your VPS. Since we rely on block storage, there’s no upper limit to how much you can add—you can purchase anywhere from 5 GB to 100 TB of NVMe storage per VPS.
Step 1: Log in to the customer portal
- Visit our customer portal and log in with your login details.
Step 2: Navigate to “Billing” for the selected Virtual Server
- After logging in, navigate to your VPS and open the billing tab.
- Scroll down until you see “Upgrade/Downgrade Service” as shown in the image below
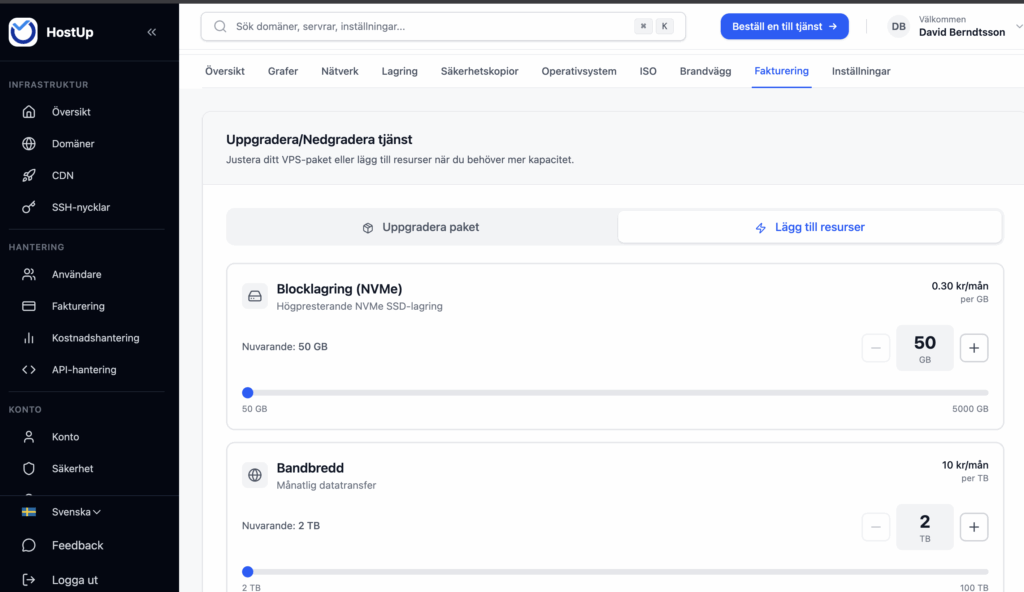
Purchase additional storage space
- On this page you have two options, “Separate Block Storage” and “Block Storage”.
- The difference between these is that if you purchase Block Storage, your VM main disk will automatically be expanded with the amount of storage you choose.
- If you instead choose Separate Block Storage, you will have the opportunity to decide how much your disk should be expanded by but also the opportunity to add additional separate disks.
- By separate disks we mean /dev/sda , /dev/sdb , /dev/sdc , etc.
Separate Block Storage – manage disk devices
Step 1: Navigate to the Storage Overview
- Tap the “Storage” tab
- If you have purchased “Separate Block Storage” you will see options to add a new disk:
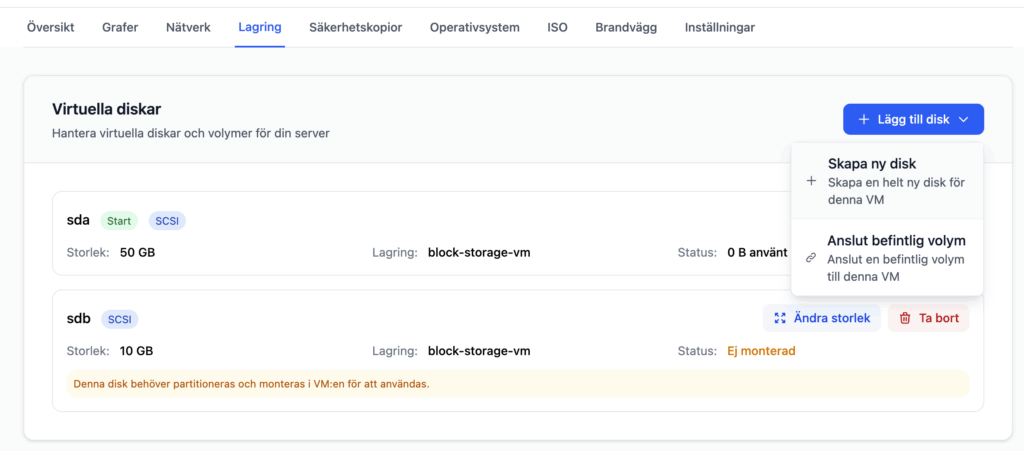
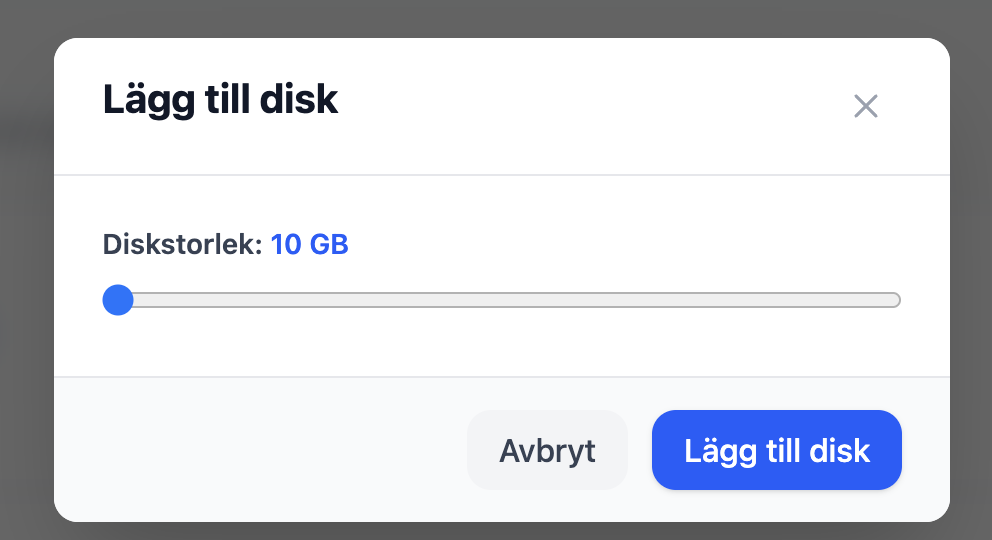
Add new disk
- To add a new disk, press the “Add New Disk” button.
- Select how much storage space you want the disk to have and then press the “Add New Disk” button.
- Your VM will not restart and everything will usually be ready to use right away. If you don’t see the new disk when you type the “lsblk” command in your VPS, you will usually need to restart it manually.
- In the example above I added a 15GB disk. If you log in to your VPS and then run the command “lsblk” you will see your new disk, sdb.
- On Windows Server you will be able to format the new disk under Disk Management.

Increase the amount of storage
Once you’ve purchased additional storage space, the final step is to expand your partition. It’s very easy and takes just three steps.
First, run the following command to make the system recognize that the storage size has changed:
sudo dd iflag=direct if=/dev/sda of=/dev/null count=1
echo "1" | sudo tee /sys/class/block/sda/device/rescan
After that, we need to find out which partition / is mounted on.
Run the lsblk command to do this. In the example below, we can see that it’s on sda3.

If lsblk indicates that / is on sda3, run these two commands to expand the partition:
growpart /dev/sda 3
xfs_growfs /
Getting the error message xfs_growfs: / is not a mounted XFS filesystem? If so, your file system might be using ext4 instead of xfs. Run the following command instead. Replace sda3, just as before, with the partition you actually want to expand
resize2fs /dev/sda3