 English
 Swedish
Getting started with Redis on your web hosting is easy and reliable.
Follow the steps below to enable Redis and connect it to your WordPress installation.
Log in to the control panel
Start by logging in to your cPanel. You can do this by navigating to yourdomain.com/cpanel.
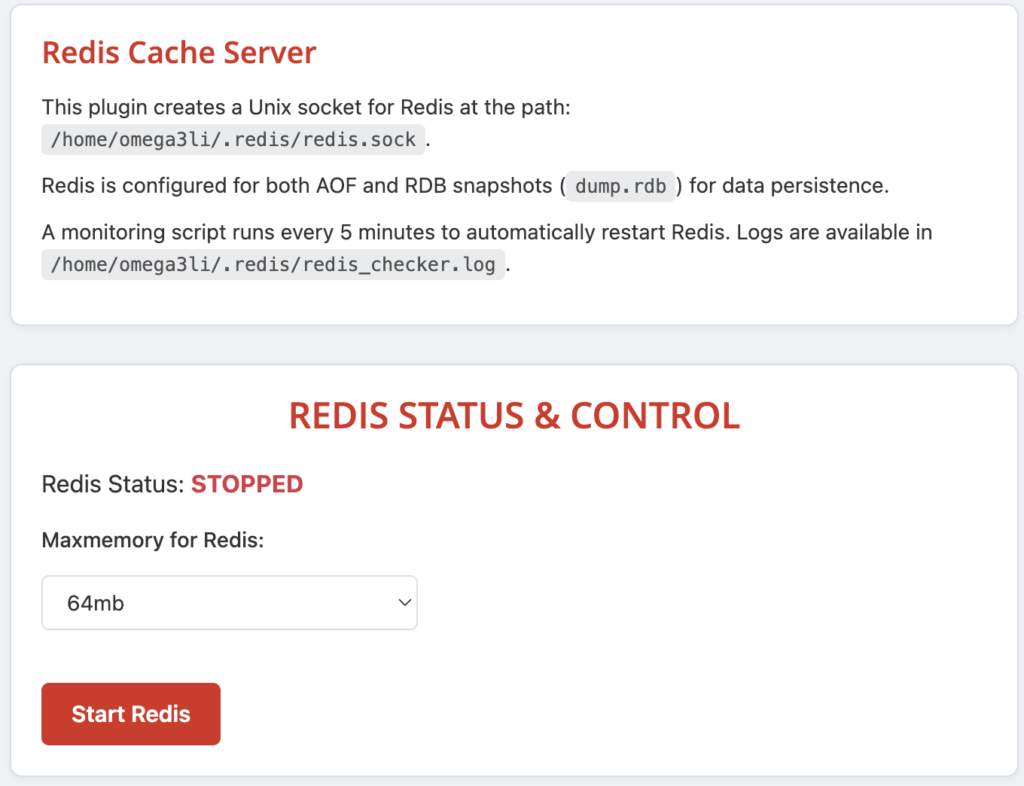
Navigate to Redis Socket under the HostUp Features category. There you will find your unique socket path – save this if you want to use Redis in other applications.

Start Redis
Click the Start Redis button.
Once Redis is running, a cronjob script will automatically be added in the background to ensure that Redis starts up again automatically in case it is unintentionally shut down.
Activate Redis Object Cache for WordPress
Start by scrolling down to the “WordPress Integration” section and select which WordPress installation you want to enable Object Cache for in the dropdown menu.
Then first press the ‘wp-config.php‘ button and then the ‘Install & activate plugin‘ button as shown in the image below:
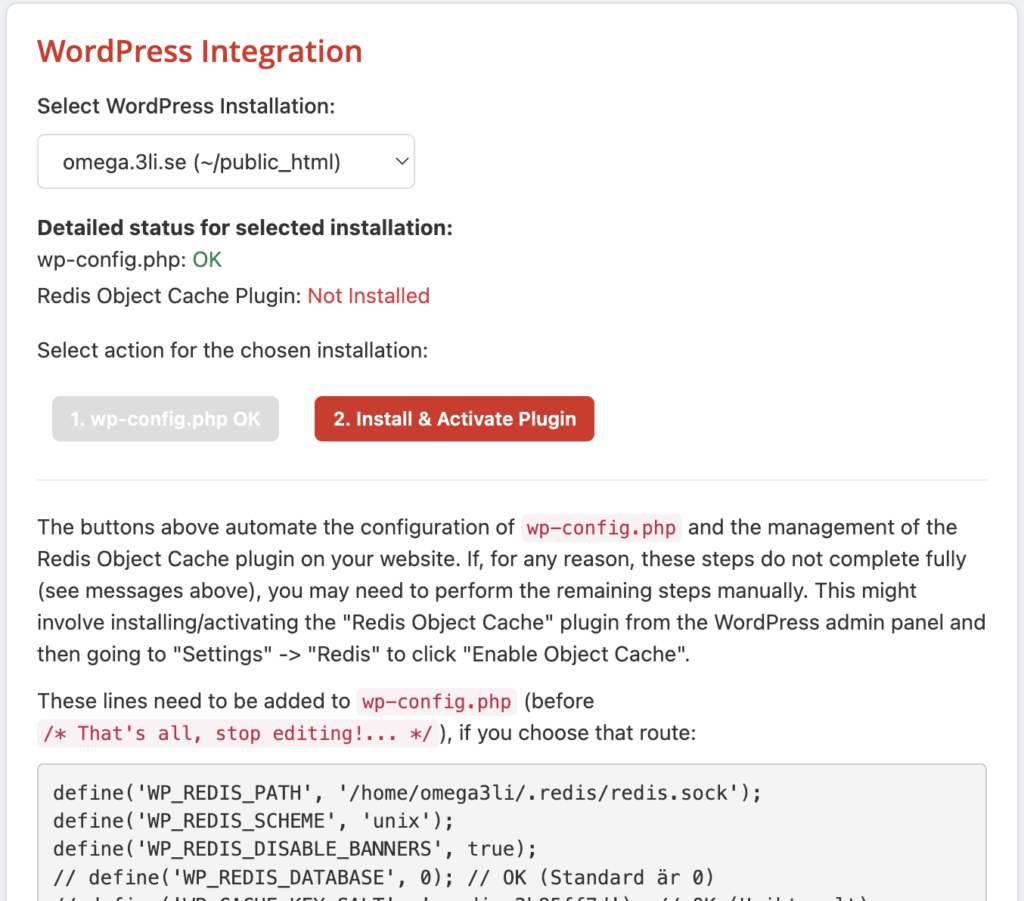
Well done, everything is set and your WordPress installation now has Redis Cache! The plugin installed on your website and configured is Redis Object Cache.
For other software that is not WordPress, you can certainly use Redis as well, but you will need to configure it manually. Check the documentation on how to do it – all you really need to know is your Redis socket path, which is at the top of the first image!