 English
 Swedish
Whether you want to use services like Google Workspace to verify the domain in Search Console, point your domain to SquareSpace, Shopify, or any other online service, you will use DNS. This is a guide that explains how you can manage these settings:
Step 1: Log in to the customer zone
- Visit our Client Area and login if needed.
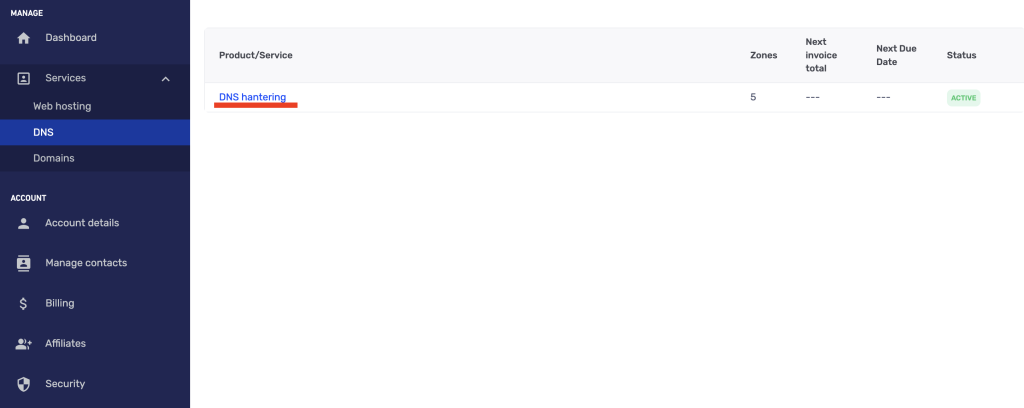
Step 2: Navigate to DNS Management
- Once you are logged in, look for the main menu on the left side of the screen.
- Click on “Services” and then on “DNS” to access your DNS settings.
- On the DNS page, click on “DNS Management” to see a list of your domain names.
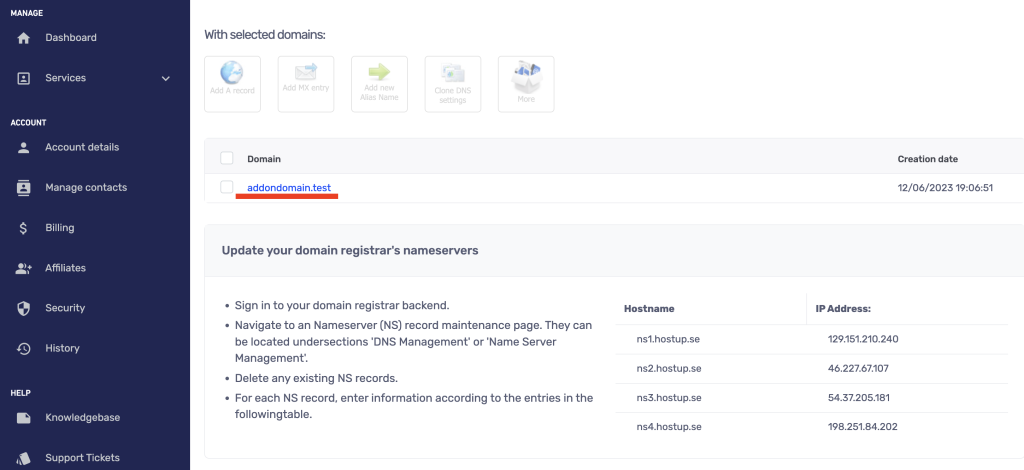
Step 3: Select the right domain
- Select the domain name you want to manage.
- If you have multiple domain names, you can bulk manage and add DNS records for all of them simultaneously.
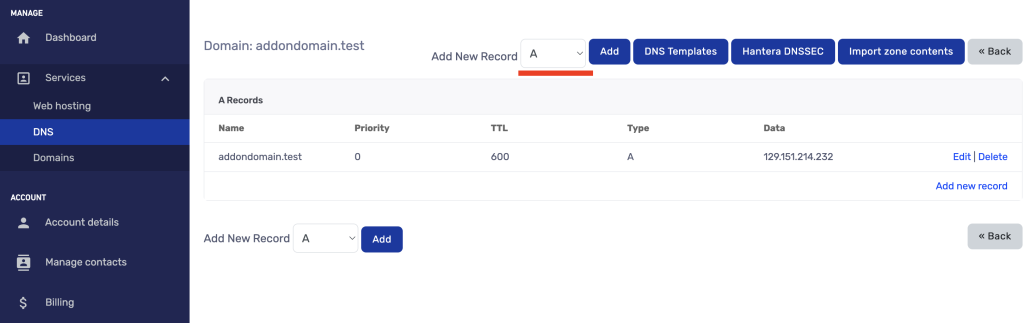
Step 4: Add the correct DNS record
- At the top of the page, you can choose the type of DNS record you want to add (see the image below). To add a TXT record, click on the dropdown arrow for the list and select “TXT,” then click on “Add.” This menu also includes MX and CNAME types.
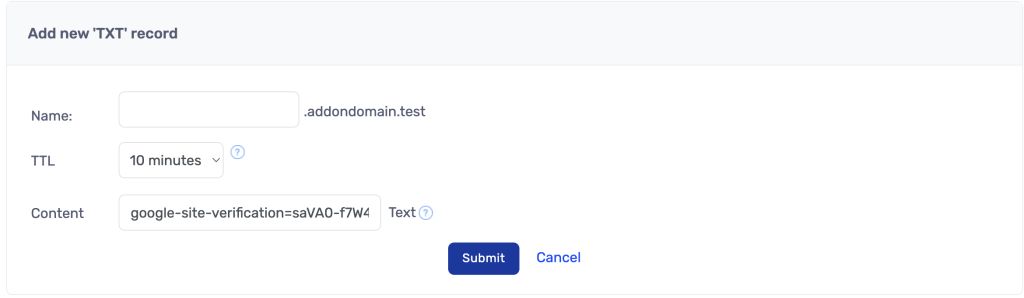
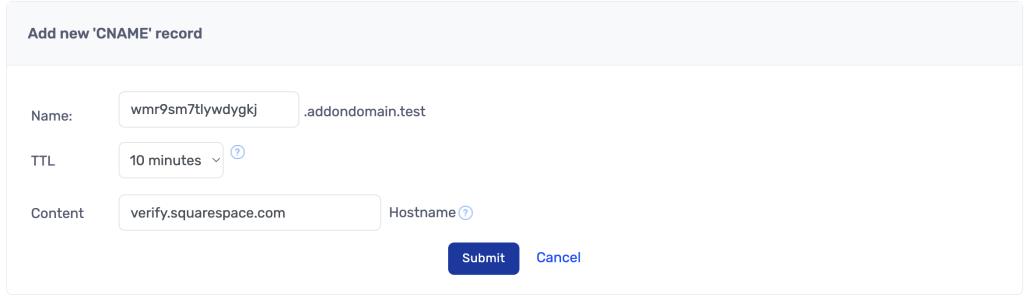
Step 5: Fill in the fields
- In the example below, a Google verification record is being added.
- Always leave the name field empty unless otherwise specified for all records except CNAME. This is equivalent to entering @ or example.se.
- It is in the name field that you can choose if you want your DNS record on a subdomain. If you enter xyz, your DNS record will be at xyz.example.se.
Step 5: Save your changes
- Save your changes after you have updated the DNS records.
- Check to ensure everything looks correct on the overview page.
Example: Connect domain to SquareSpace / Shopify
Step 1: Find out DNS records
- Before you can link your domain to SquareSpace or similar services like Shopify, you first need to find out what DNS records they require for your domain.
- Browse through your account on their site until you find something similar to:
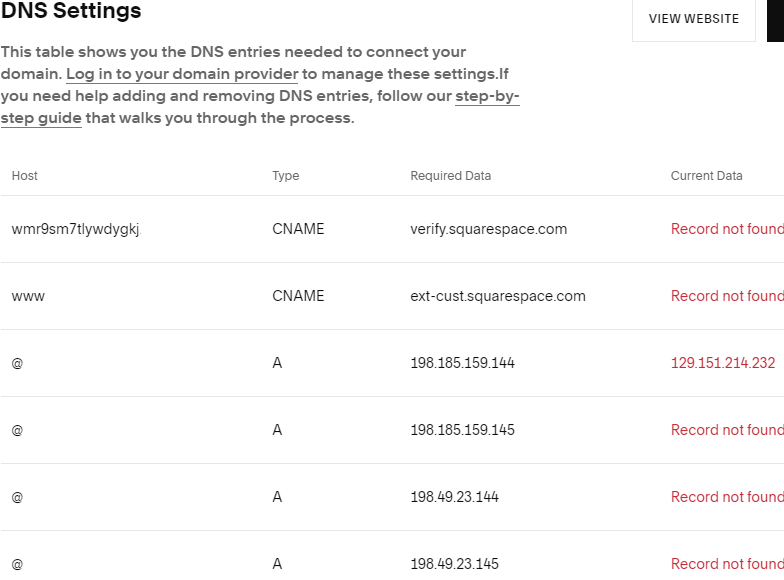
Step 2: Add the first DNS record.
In the example above, they want us to add:
| Host | Type | Required Data |
| wmr9sm7tlywdygkj | CNAME | verify.squarespace.com |
We can do this by selecting CNAME type as shown in Step 4 above and then entering it as follows:
- Host is the same as Name in the DNS manager.
- Required Data is the same as Content in the DNS manager.
Repeat the same process for the remaining entries. When you see @, leave the name field empty.
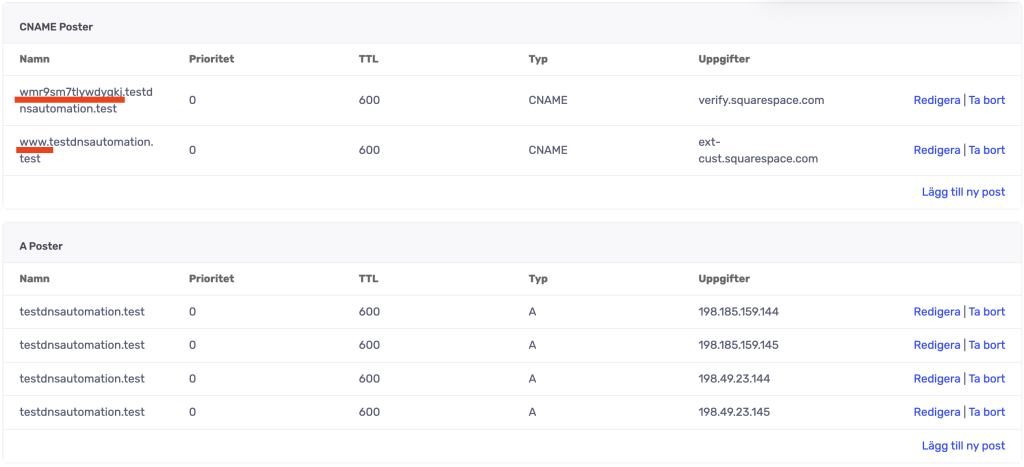
Step 3: Overview
If everything is correct, the overview page will look like the image below.
It’s important to ensure that no CNAME records are directly on the domain, meaning they should not be on example.com. CNAME must be on a subdomain like www.example.com, as shown in the image below.
Tips:
- Use tools like ‘nslookup’ to ensure that your changes have taken effect.
- You can create forwards with DNS by using forwarddomain.net. If you have web hosting with us, you can create forwards for your domains there instead.
- If you add a new A record, make sure to delete the old DNS record if it is no longer needed.