 English
 Swedish
Step 1: Log in to the customer portal
- Visit our customer portal and log in with your login details.
Step 2: Manage SSH Keys
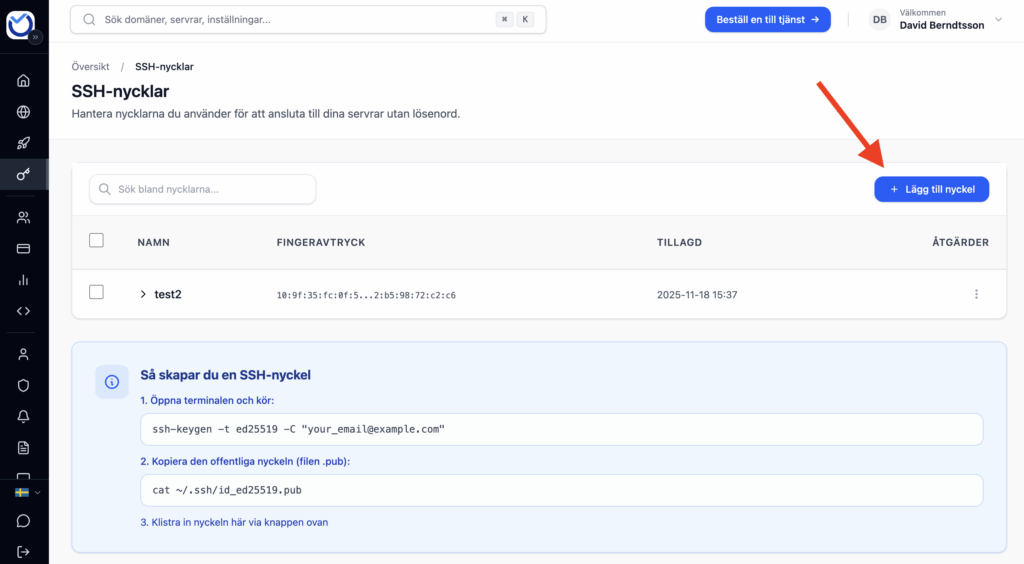
- After logging in, click on “Manage SSH Keys” in the main menu as shown in the image below.
- On this page you can both delete an existing key and add a new one.
- To add an SSH key, click on the “Add a new SSH key” button
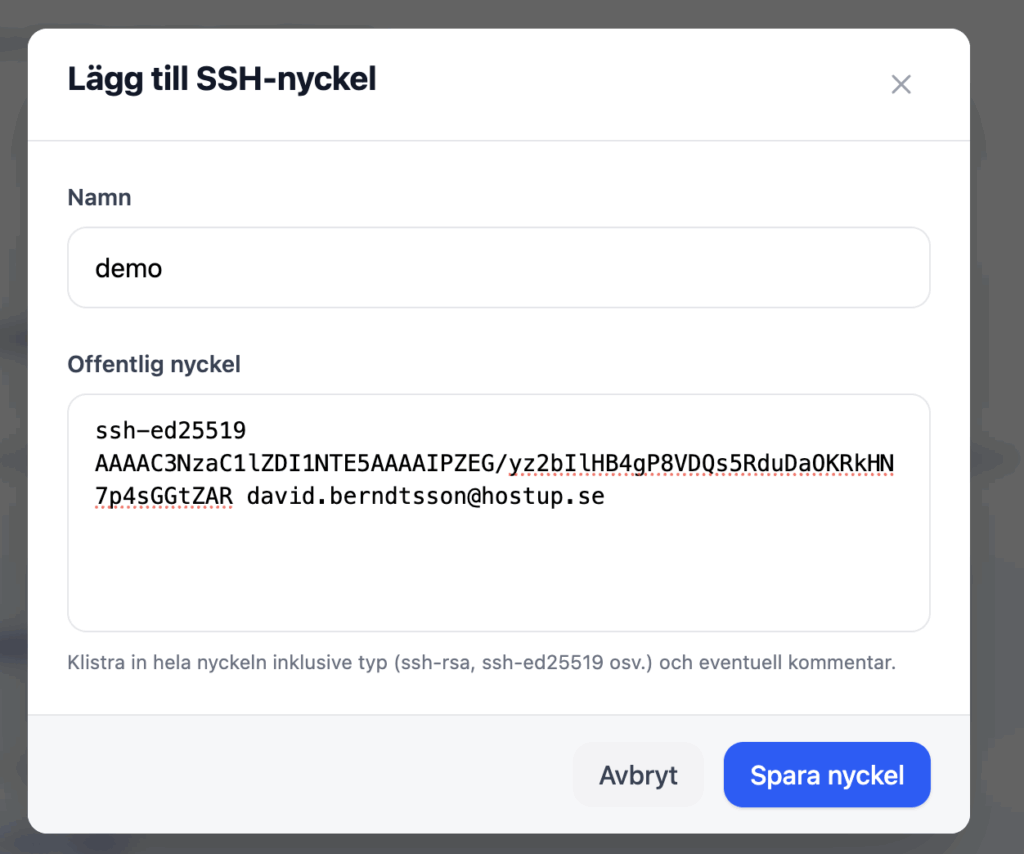
- Enter your public key. Make sure it is your public key and not your private key (you should never share it!). On MacOS and Linux it is located in .ssh/id_rsa.pub, alternatively .ssh/id_ed25519.pub. The important part here is that it has .pub, the file without the extension is your private key. It should look something like the image below:
Apply the key to an existing VPS
The SSH key is now stored in your account with us and can be selected when you purchase new VPSs. To add it to an existing VPS, follow these steps.
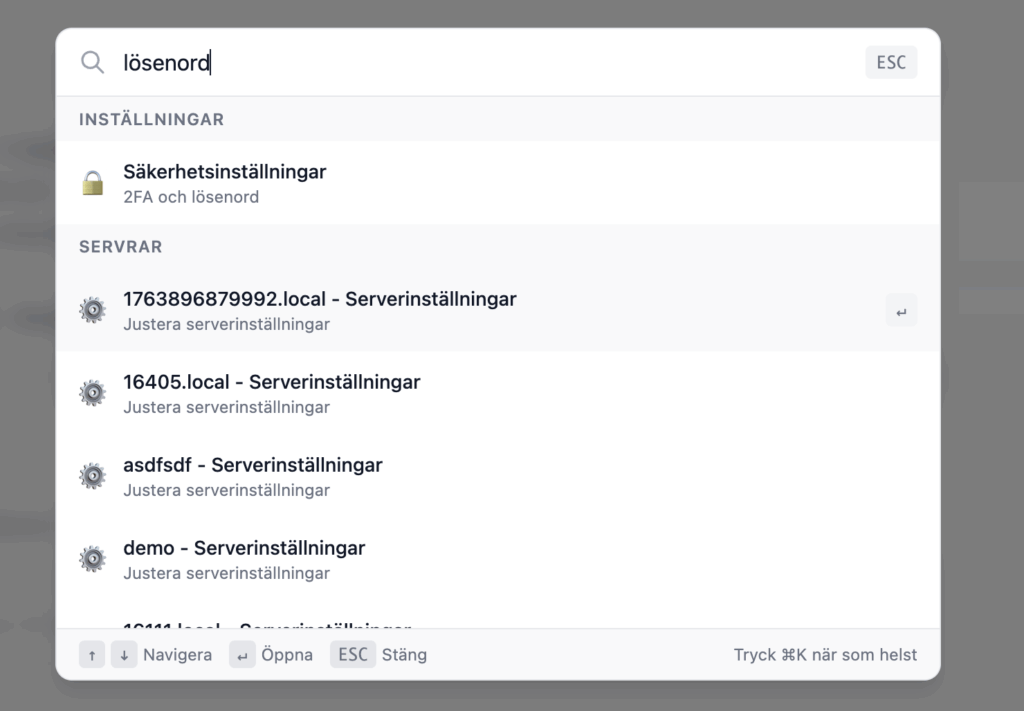
Step 1: Navigate to your VPS settings
- Use the search box at the top and search for “password” or “SSH”. Select the server you want to add the ssh key to
On the next page, scroll down to ”Access” and click ”Select SSH Keys”
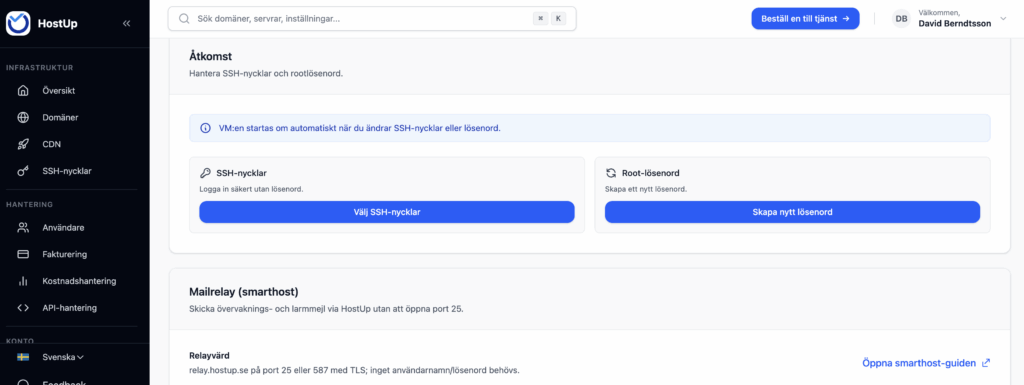
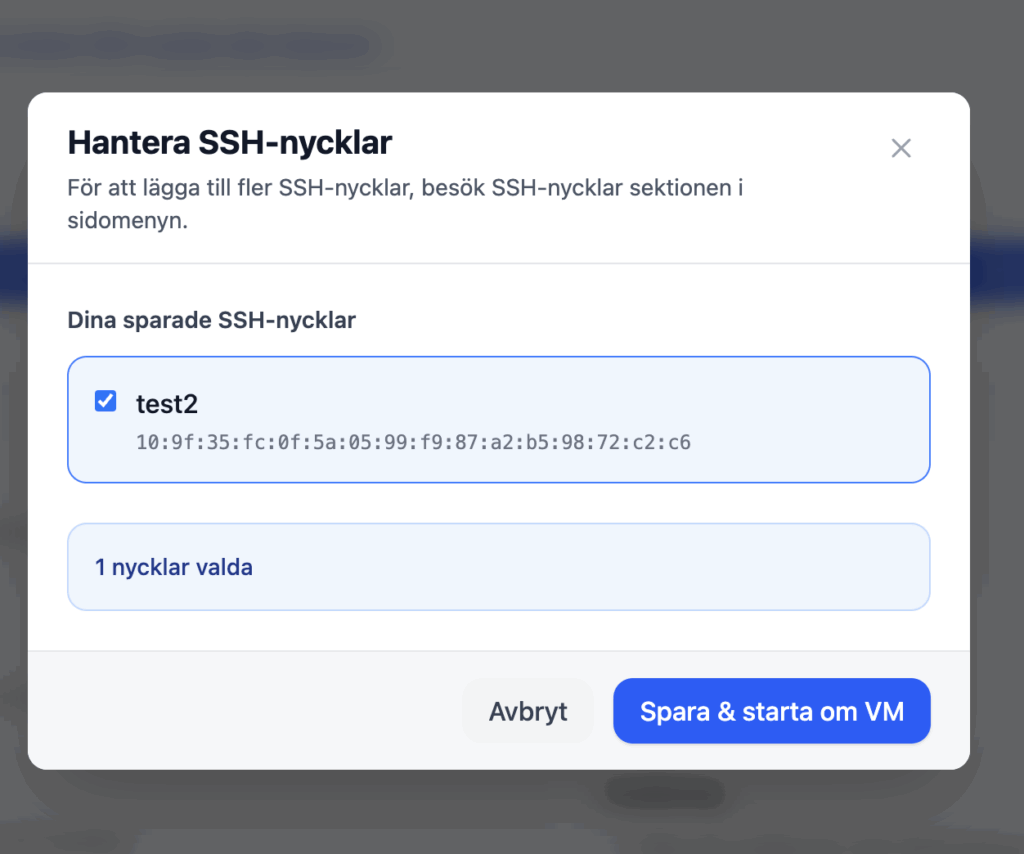
Step 2: Add the SSH key to your VPS
- After you press “Select SSH Keys” select a key and click “Save & Restart VM”
Was this article helpful?
Tack för din feedback!