 English
 Swedish
Log in to the customer portal
- Besök vår kundportal och logga in med dina inloggningsuppgifter.
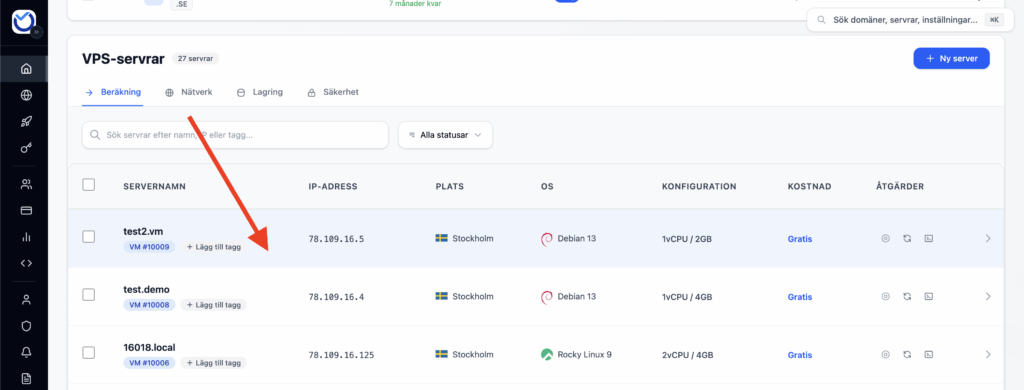
Select the VPS you want to manage
- Select the VPS you want to access the control panel for by pressing the gear highlighted in the image below:
Install new OS
- Under the “Operating system” tab, you can select a new operating system
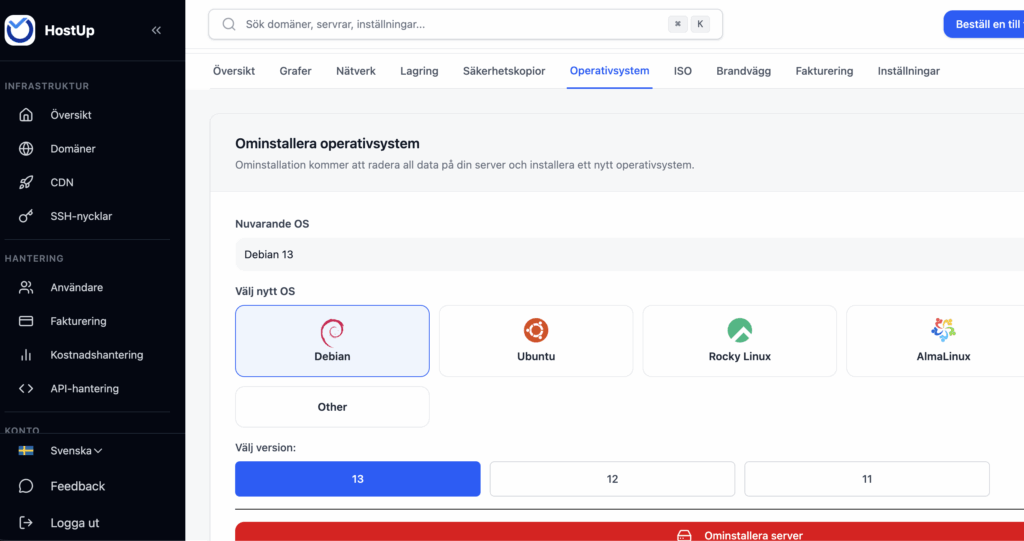
- Select the OS you want to install and then press “Reinstall Server”
Once the reinstallation is complete, you will receive an email with new login credentials for your VPS.
Please note that all data on your VPS will be deleted when you reinstall it. Therefore, make sure you have backed up any important files!
Was this article helpful?
Tack för din feedback!