 English
 Swedish



You can connect HostUp straight to the AI app you already use — Claude, ChatGPT, Cursor or any other MCP client. After that you manage your services by writing what you want done: add a DNS record, spin up a server, put your SSH key on your hosting account, register a domain. No panel to hunt through, nothing to install.
This guide covers how to connect, how to pick the right permissions, and what actually happens when your AI changes something on your account.
What is MCP?
MCP (Model Context Protocol) is the standard AI apps use to connect to outside services. HostUp runs a native MCP server — a first among hosting providers in Sweden.
The server is hosted by us. You add one address in your AI app and your services are there. There is nothing to install on your machine.
Before you start
You need two things: a HostUp account with at least one service, and an AI app that supports MCP connectors. Claude works on every plan including the free one. ChatGPT needs Plus or Pro, because connectors sit behind developer mode.
Step 1: Create an API key
The key is what ties your AI app to your account. Go to API Management in the client area and click Create API Key.
Give it a name you’ll recognise — “Claude”, say — then open the Permissions tab. This is where you decide what your AI is allowed to do.
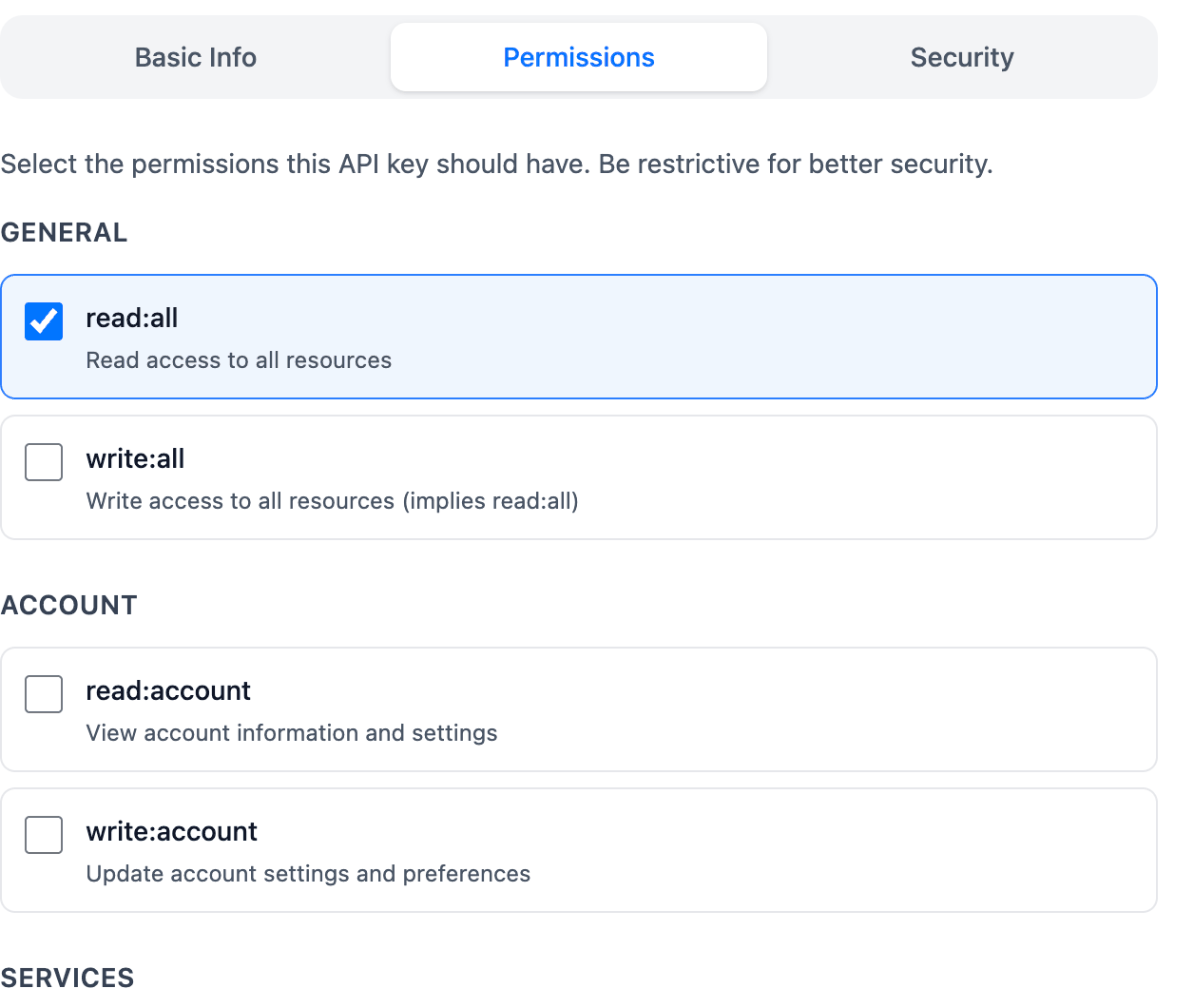
Which permissions should I pick?
Permissions aren’t only a lock — they decide what your AI can even see. Leave out the write scopes and the tools that change things never appear. Your AI can look your services up but not touch them, and it won’t suggest changes it can’t make anyway.
- Just want to ask questions? Leave
read:allticked and skip the write scopes. You get a connector that can answer anything about your services but never change one. - Want it to handle one job? Go narrow. A key with only
read:dnsandwrite:dnsgives you an AI that helps with DNS records and nothing else. - Want it to handle everything? Tick
read:allandwrite:all.
One thing to weigh: the full toolset takes up roughly 20,000 tokens of your AI’s memory every time it uses the connector. Give it the scopes you actually plan to use and you leave more room for the conversation itself.
You can change your mind later. If your AI runs into a missing tool, it also gets a link that upgrades that same key — no need to create a new one and reconnect.
Step 2: Add the connector in your AI app
Further down the same page you’ll find the AI connectors (MCP) card. It has ready-made instructions for each app — pick your tab and copy what’s there.
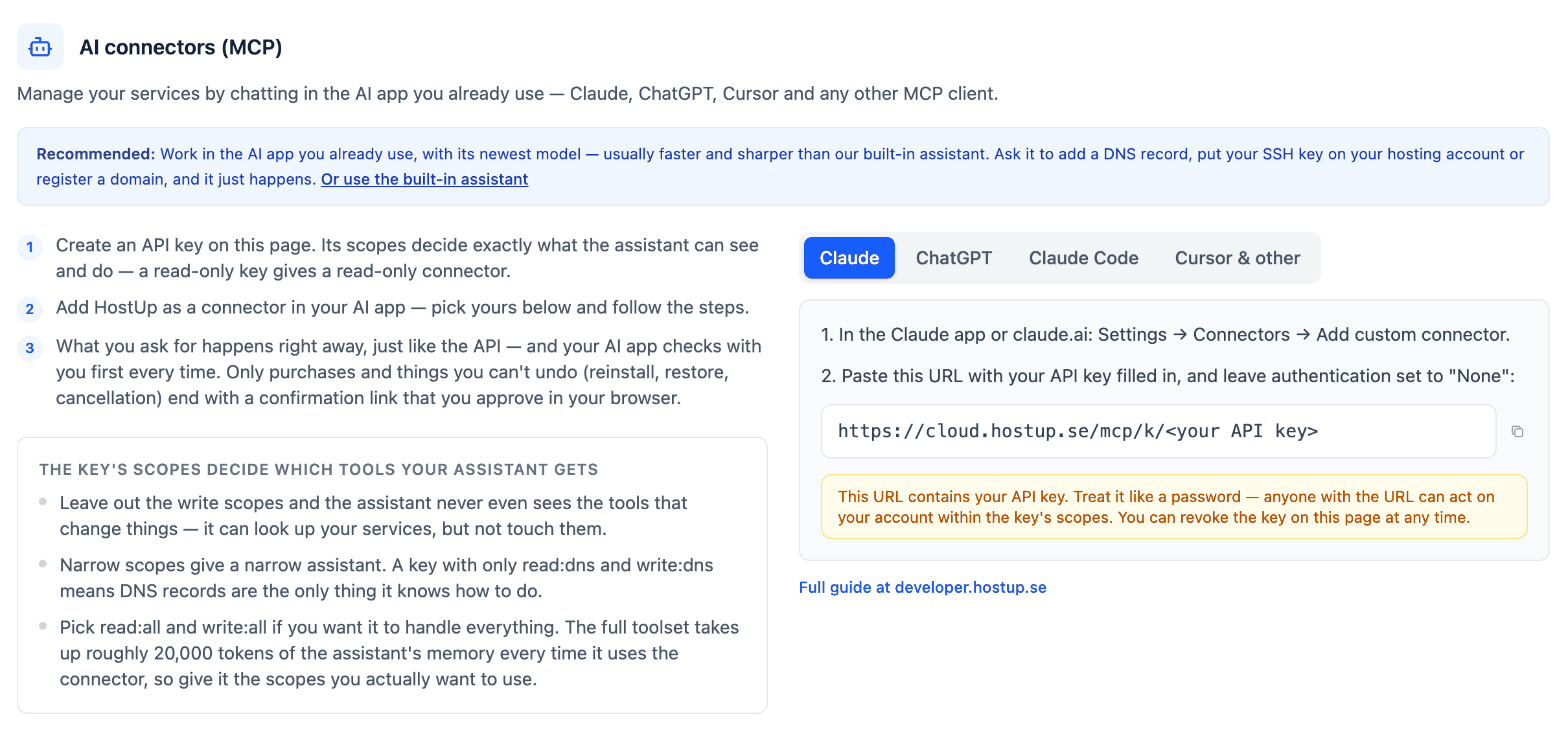
Claude
Go to Settings → Connectors → Add custom connector in the Claude app or on claude.ai. Paste the address below with your API key filled in, and leave authentication set to “None”.
https://cloud.hostup.se/mcp/k/<your API key>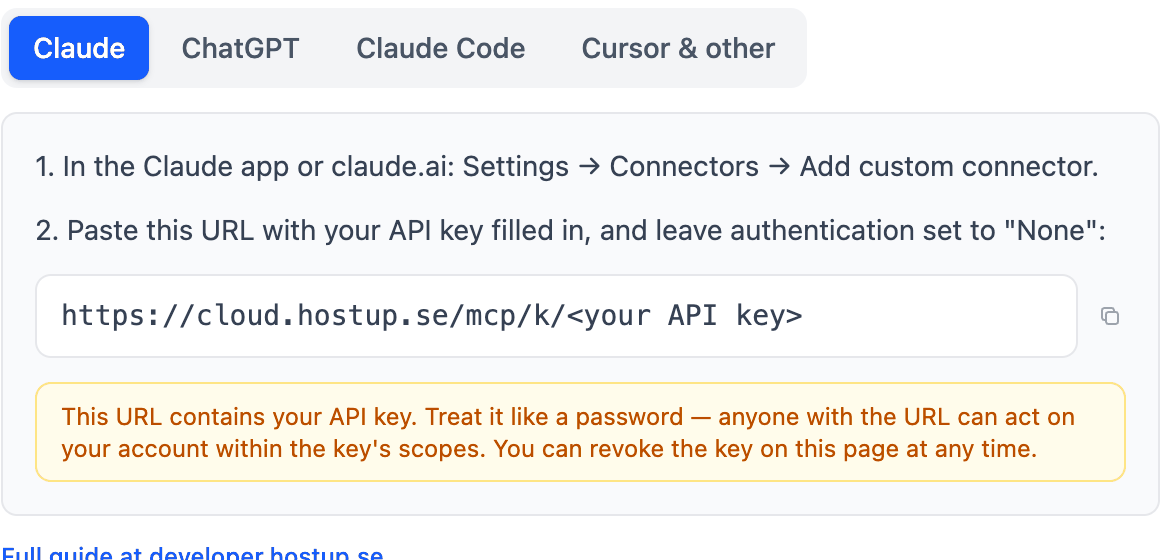
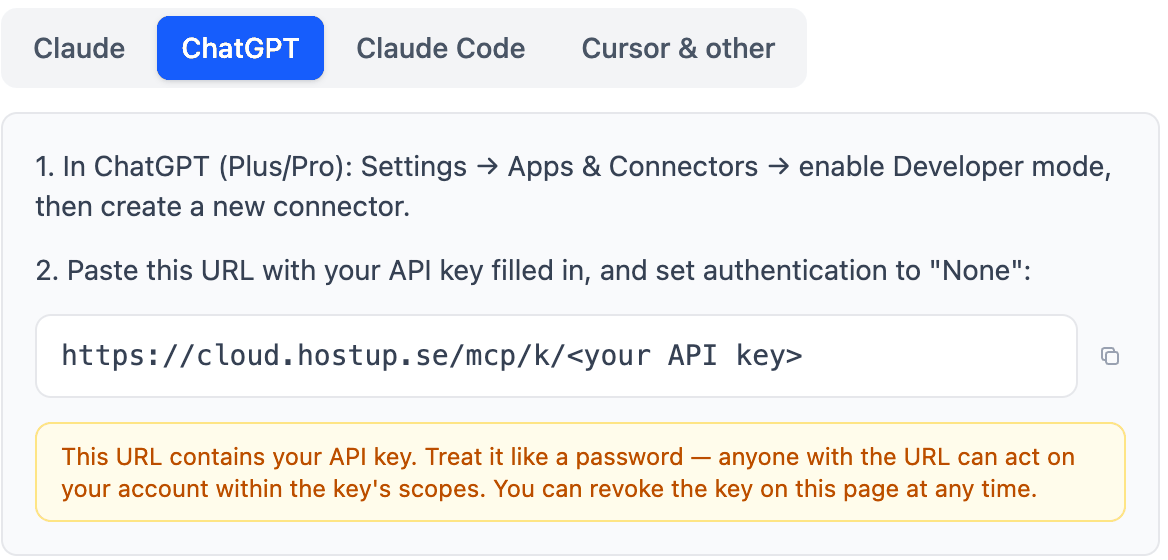
ChatGPT
Go to Settings → Apps & Connectors, turn on Developer mode and create a new connector. Use the same address as for Claude and set authentication to “None”.
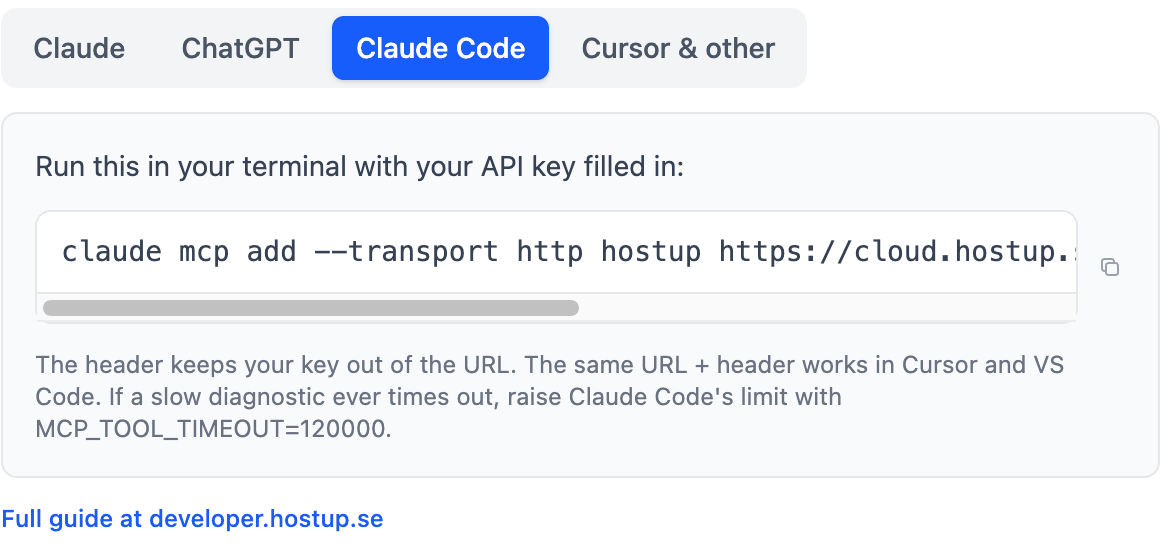
Claude Code
Run this in your terminal with your key filled in:
claude mcp add --transport http hostup \
  https://cloud.hostup.se/mcp \
  --header "Authorization: Bearer <your API key>"
Here the key sits in a header rather than in the address, which is safer. The same setup works in Cursor and VS Code.
Cursor and other MCP clients
Add a remote MCP server (Streamable HTTP) with the address https://cloud.hostup.se/mcp and send your key as a header:
Authorization: Bearer <your API key>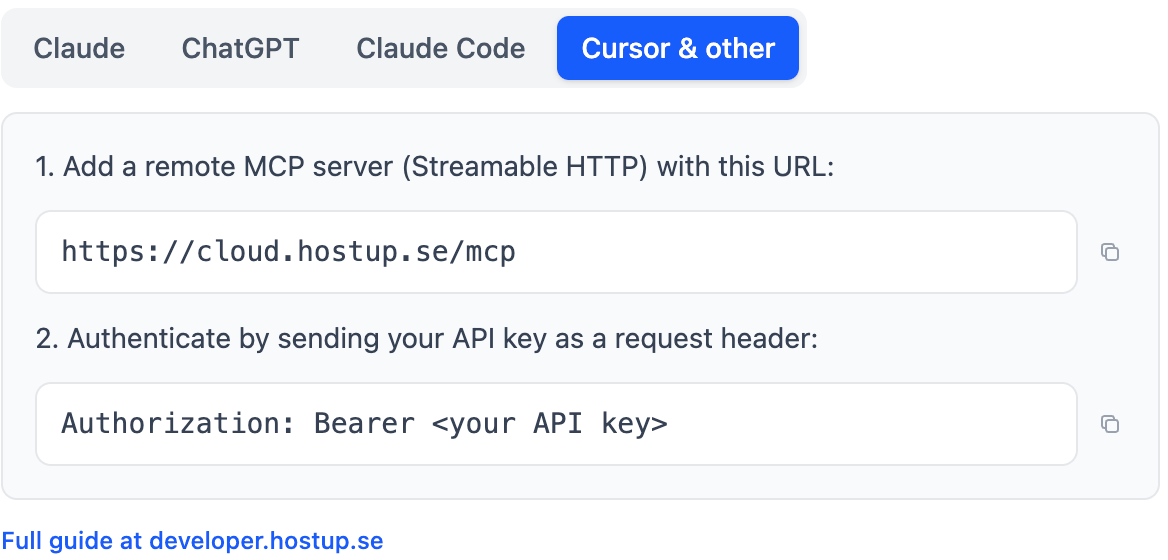
What happens when your AI changes something?
What you ask for happens right away, exactly as if you had made the API call yourself. Your AI app checks with you first every time — that’s the app’s own approval prompt before it uses a tool.
Two kinds of action make an extra stop at our end and finish with a confirmation link you open in your browser:
- Anything that costs money. Registering a domain, ordering a service, paying an invoice.
- Anything you can’t undo. Reinstalling a VPS, restoring from a backup, and cancelling a service.
In those cases your AI prepares the action and shows you a summary plus a link. Nothing goes through until you click. So your AI can never buy something on your behalf or wipe a server on its own.
Other changes — adding a DNS record, switching PHP version, creating an email address — happen directly. If you want a connector that can’t change anything at all, the key’s permissions are the tool for that, not the confirmation links.
Every action is logged to your account and shows up in the audit log.
Security: treat the address like a password
If you use the variant with the key in the address — the one Claude and ChatGPT use — then the address itself contains your API key. Anyone who has it can act on your account within that key’s permissions.
- Never share the address, and don’t paste it into shared documents or chats.
- Use the header variant where your app supports it — that keeps the key out of the address.
- Think a key has leaked? Revoke it under API Management and create a new one. The old one stops working immediately.
Bear in mind too that the conversation in your AI app can hold sensitive material. Ask for an EPP code or a cPanel login link and it lands in your chat history — treat that history accordingly.
If something doesn’t work
Your AI says it can’t do something
Almost always the key is missing a permission. Your AI gets a link that upgrades that same key — click it, then start a new conversation if the new tools don’t show up straight away.
The connector doesn’t respond
Check that the key was copied correctly and hasn’t been revoked. Each key is allowed 300 requests per five-minute window, so heavy use may mean waiting a moment.
A slow diagnostic times out in Claude Code
Claude Code waits 30 seconds for a tool by default. Some diagnostics take longer. Raise the limit with:
MCP_TOOL_TIMEOUT=120000Prefer our own assistant?
The built-in assistant in the client area does the same things and needs no key. The difference is that an MCP connector lets you work in the app you already have open, with its newest model. Both exist — pick whichever suits you.
There’s a more technical walkthrough at developer.hostup.se.