 English
 Swedish
Getting locked out of your own server is frustrating, but luckily it’s easy to fix. Since we prioritize self-service, you can reset your root password (or Windows administrator password) directly in our customer portal in just a few minutes.
Preparations
Before you begin, make sure you have access to cloud.hostup.se. Restarting the server is usually required before you reset the password, so if you’ve got anything mission-critical running, it’s a good idea to schedule this for a low-traffic period.
Step by step: How to reset the password
- Log in to the customer zone.
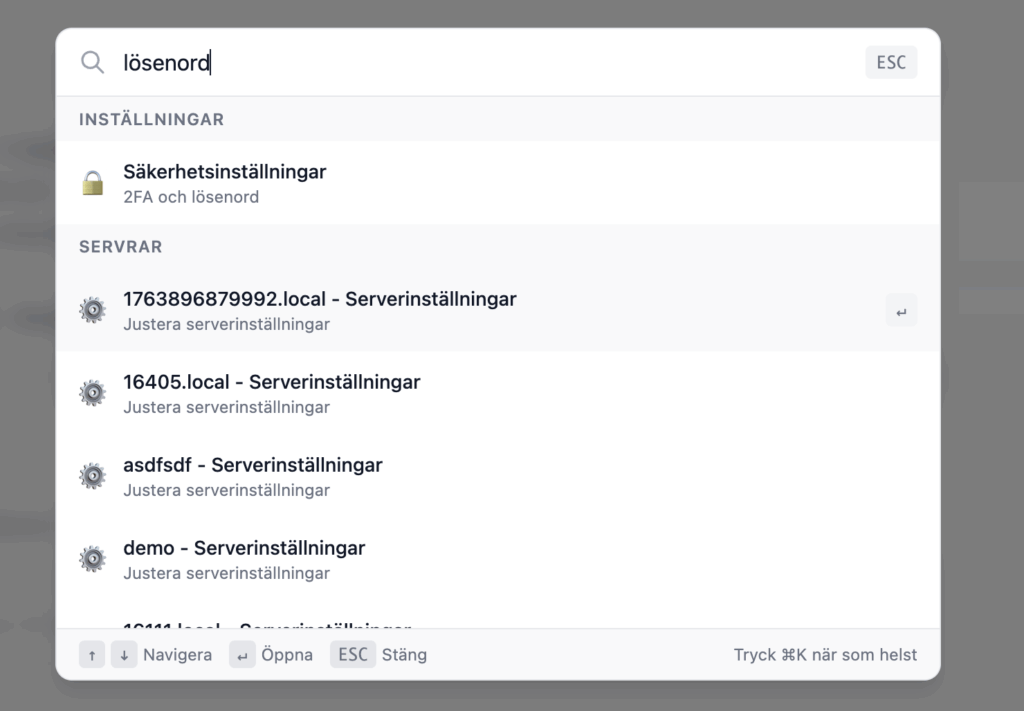
- Use the search box at the top and search for “password”. Select the server you want to reset the password for:
On the next page, scroll down to “Access” and click “Create new password”.
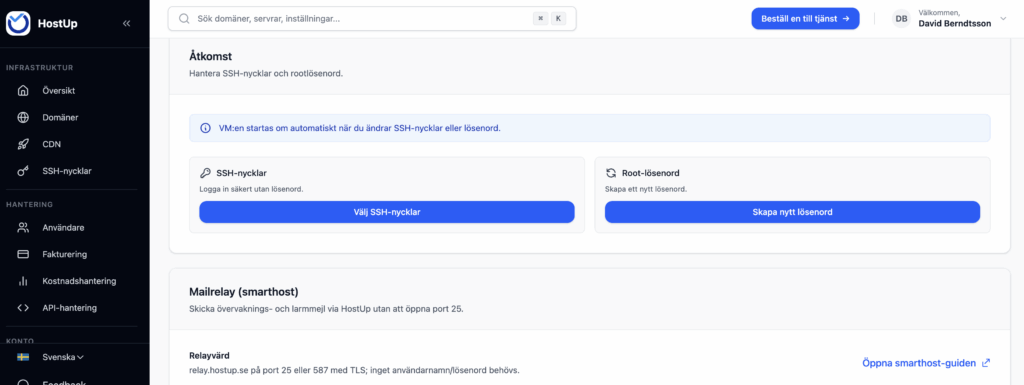
- Enter your new password in the fields. Remember to choose a strong password with both letters, numbers and special characters.
- Click Reset & Restart.
Common pitfalls
- Read-only file system: If your server has suffered an error or ran out of storage, the operating system can lock the disk in read-only mode to protect data. Then the password change fails because the system cannot save the new password. If this happens, you often need to restart the server in safe mode or contact support for help.
- SSH configuration: If you have modified your /etc/ssh/sshd_config to deny login with password (PasswordAuthentication no), you will still not be able to login with password via SSH, but you can use your new password to login via the console.
- Windows VPS: For Windows, the recovery applies to the Administrator account. It may take a few minutes after the restart for the RDP service to respond.
Verification
Once the server has rebooted, try logging in to verify that the new password works:
For Linux (via terminal):ssh root@your-ip-address
For Windows (via RDP):
Use Microsoft Remote Desktop and sign in as Administrator.
If you still can’t get in over the network, use the Console feature in the customer portal. It provides direct access to the screen regardless of network settings and is the best way to see if the server is hanging during startup.