 English
 Swedish
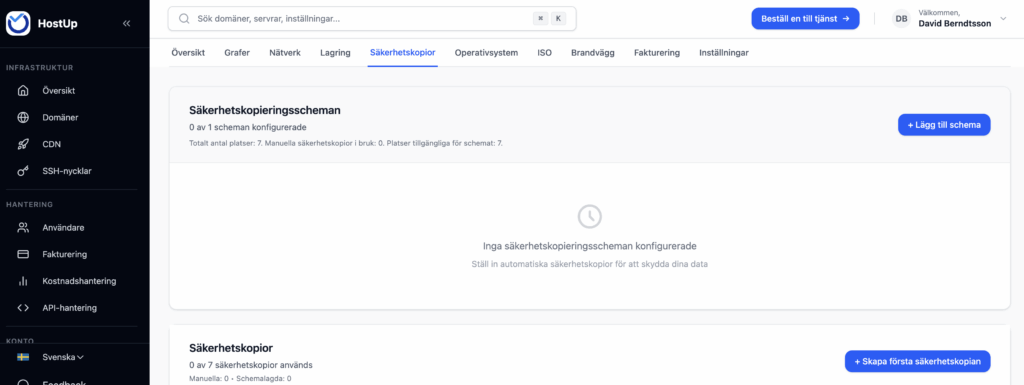
Under the “Backups” category of your VPS in the customer zone, you can manage everything related to this area. You can get here by using the search bar and searching for “Backup.”
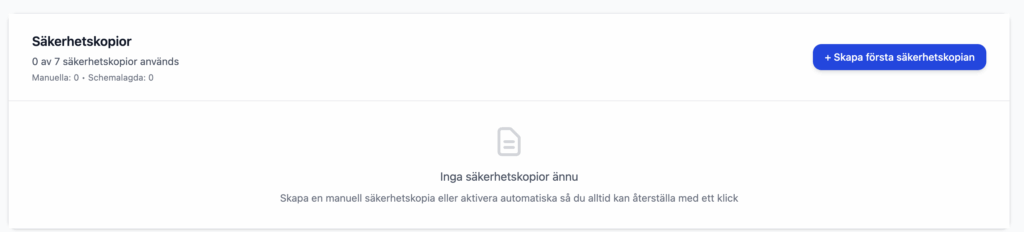
Create a backup
To create a backup, click the “Skapa säkerhetskopia” button shown in the image below:
If you choose to create a backup while the server is still running, make sure qemu-guest-agent is installed. This ensures your backup can be taken normally and prevents errors when you restore it. Run apt install qemu-guest-agent or dnf install qemu-guest-agent in the terminal to confirm this.
Restore backup
To restore a backup, locate the backup you want to restore and click “Restore”.

Depending on the size of the disk, the process can take different amounts of time. Backups are always stored locally in the data center, and each rack has a dedicated backup server with a 25 Gbps connection. You can expect a restore speed of roughly 500 MB/s. Fortunately, you can easily see how far it has progressed:
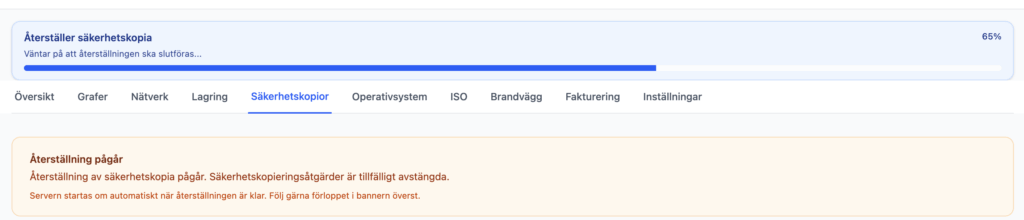
Please note that while a backup is being restored, your VPS will be unavailable. Additionally, every file will be overwritten, returning the entire disk to exactly the state it was in on that date.
Download individual files or folders from a backup
If you only need a few individual files from a backup, the best approach is to create a fresh backup of the server, restore the backup that contains the files you need, and then undo that restore by reapplying the backup you just made.
Automated Backup
Within the same tab, you can also configure backup schedules.
When a VPS is created, a backup schedule is created as well. We do this to ensure that a backup is always taken, even if you as the customer don’t have the time to set it up yourself! By default, one backup is taken every week and seven backups are kept.
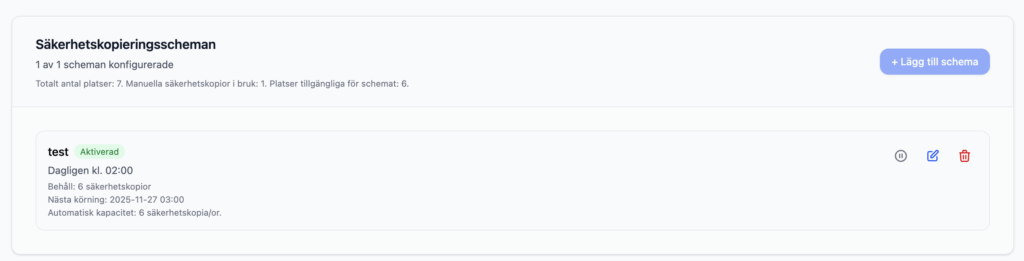
We recommend taking a weekly backup of your VPS so you can restore from an older snapshot whenever necessary. If you rely solely on daily backups, you could easily regret it if you ever need a file from 1–2 months ago.
Another good idea is to use multiple schedules. One schedule can run daily backups but, for example, keep only seven of them. Another can run a weekly backup and retain four. This way you can restore to any day within the past week while still keeping long-term backups going back a month.
Up to 7 backups are included at no extra cost. When you create backup schedules, the total number of backups you choose to retain counts toward this limit. For example, one schedule might be set to keep 2 backups while another keeps 5, giving you 7 backups in total. See our upgrade options if you’d like to purchase additional capacity.
Hourly backups
On our PAYG VPS you have the ability to create “Snapshots”. Snapshots are perfect if you want to take a “backup” of your VPS—for example, every hour—since they only store the changes made to the disk and are extremely cost-effective. In addition, you can roll back your VPS in under a minute!