
Export and import a VPS disk
Checked against the client area 5 November 2026
To move a whole server, you export the disk from the old server and import it on the new one. It works between our servers and between us and other providers. Both servers are started in a rescue system. The disk then doesn’t change in the meantime.
Open your servers in the client area
Before you start
Section titled “Before you start”- The new disk must be at least as large as the old one.
- Everything on the new server’s disk is overwritten. If you want to be able to go back, take a backup first. See Backups of your VPS.
- At another provider, start the old server in that provider’s rescue mode. The disk may be called
vdathere instead ofsda.
Start the rescue system
Section titled “Start the rescue system”Do this on each server you have with us.
-
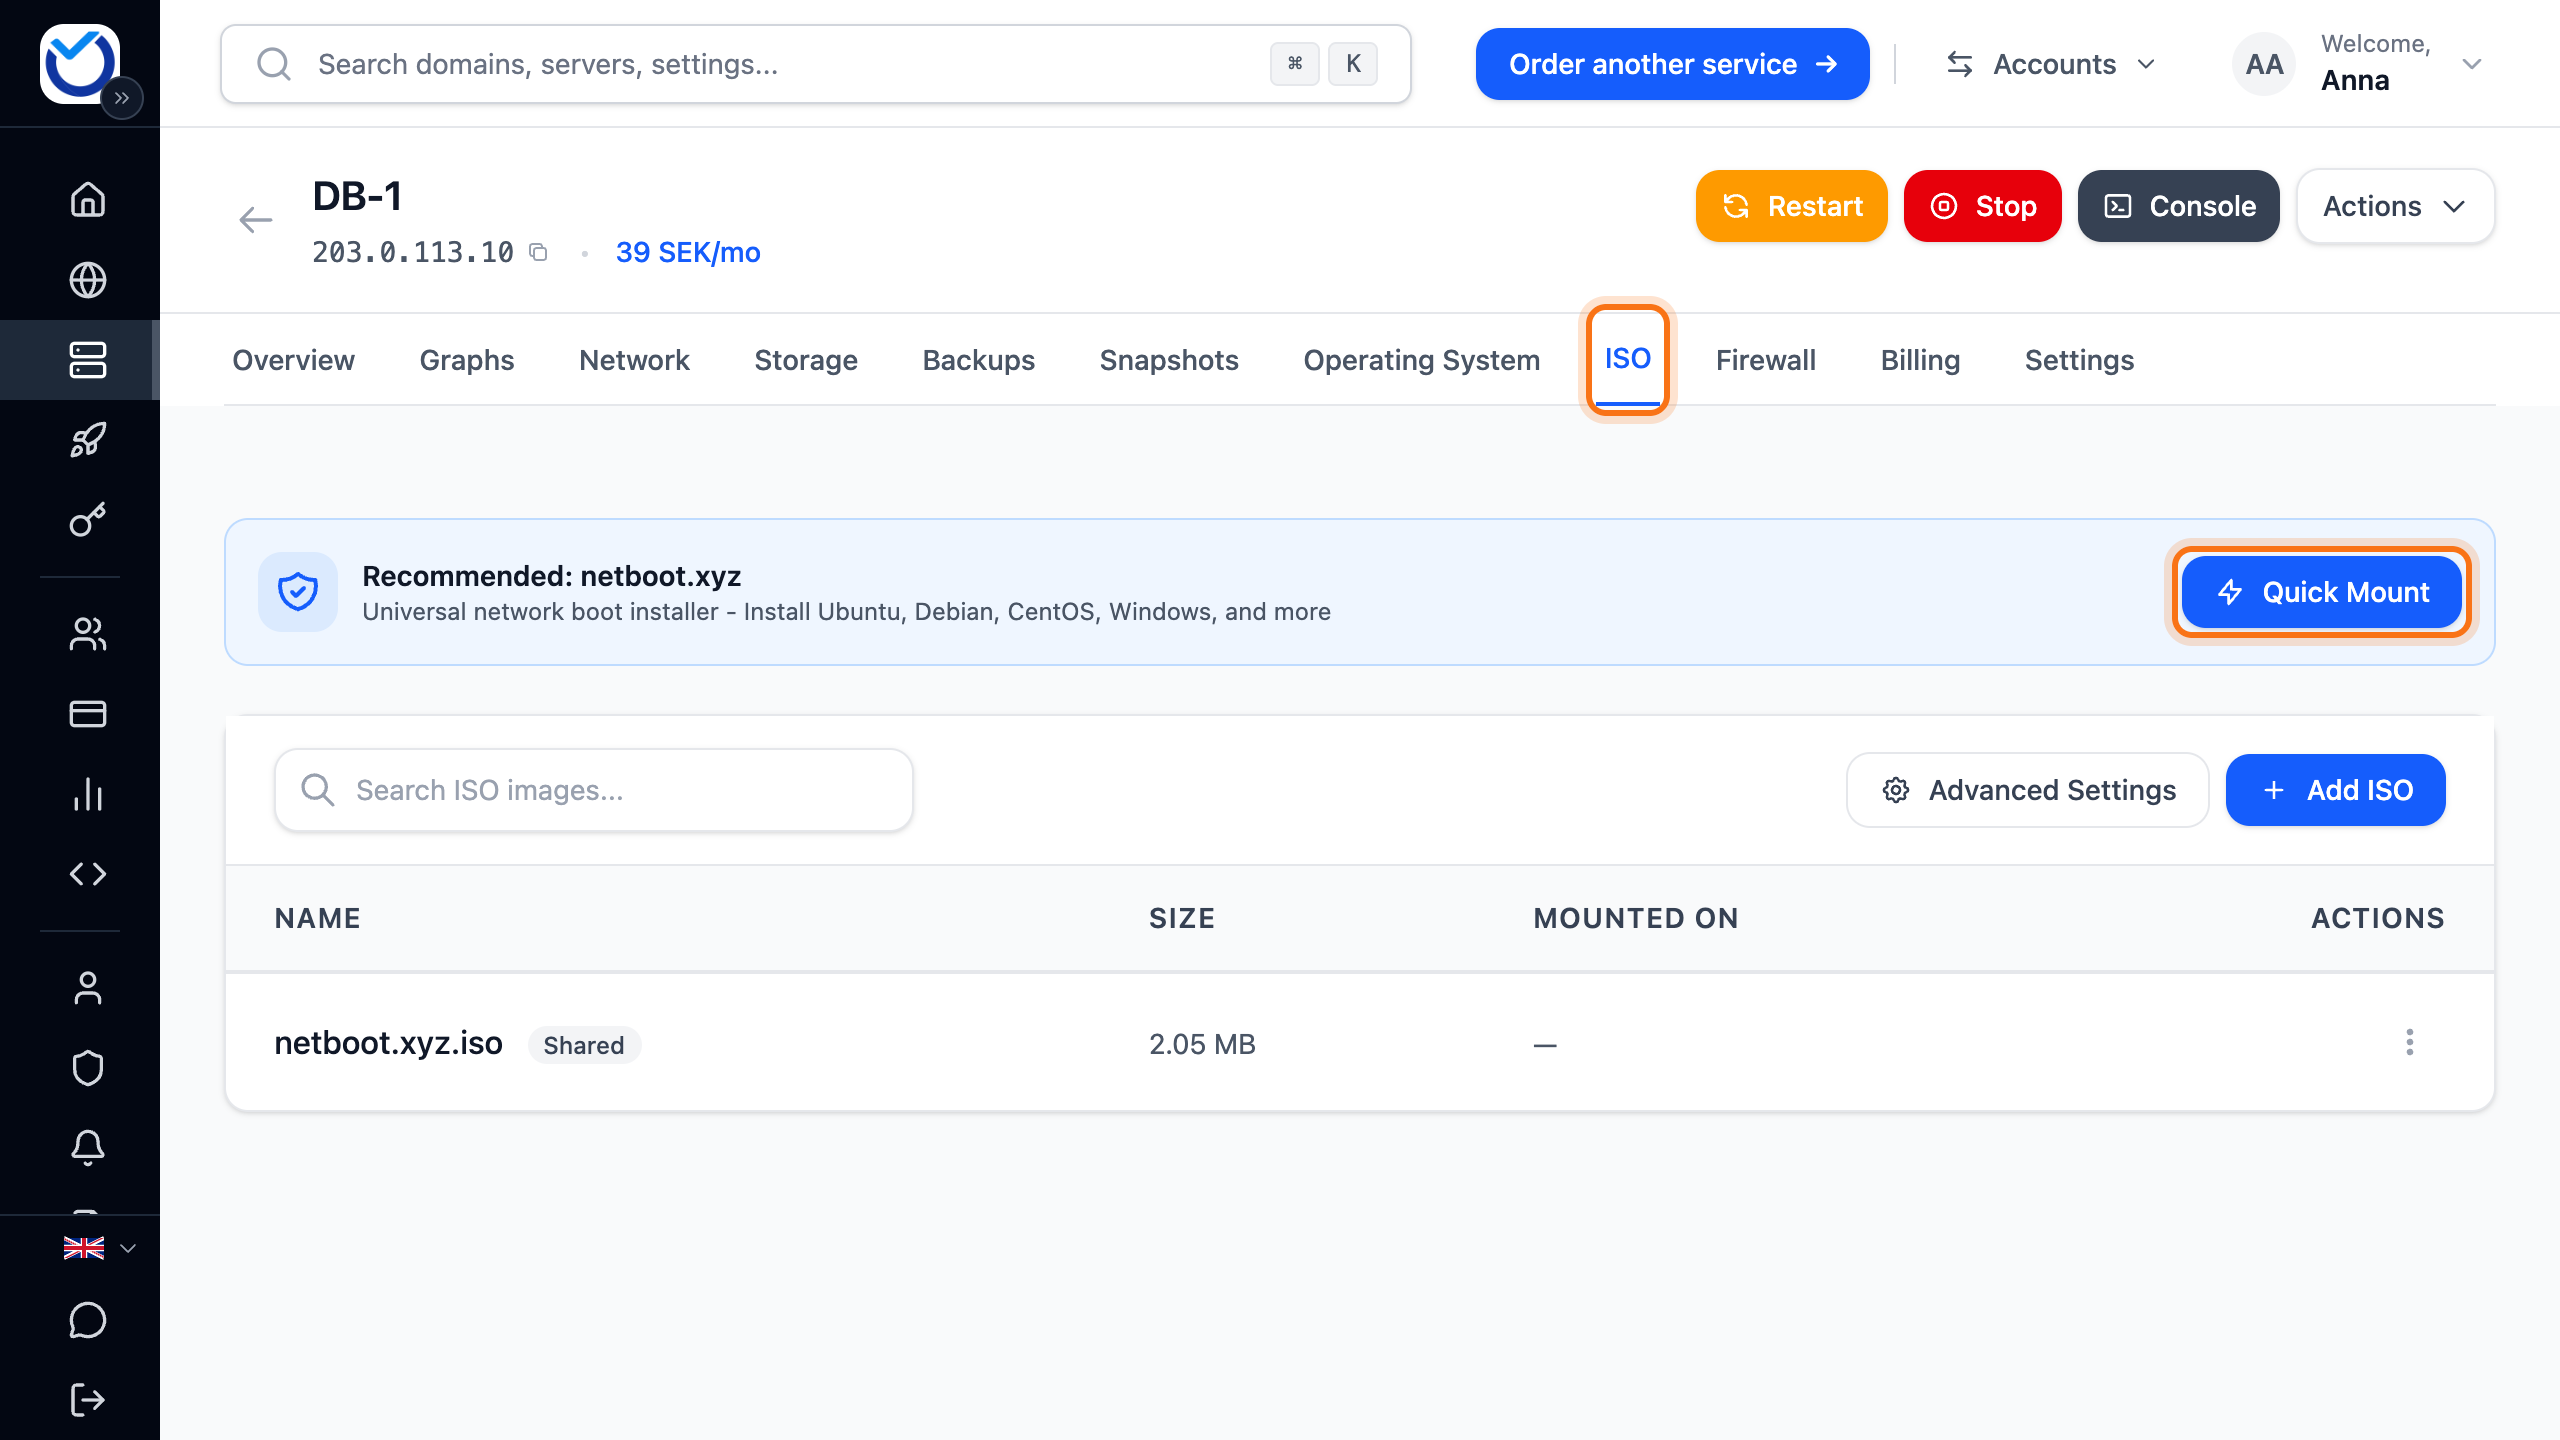
Open the server in the client area and go to the ISO tab. Click Quick Mount next to netboot.xyz. If you have no ISO files yet, the button is called Mount netboot.xyz.
-
Click Boot from ISO at the top of the tab and then Restart. The server boots from the ISO file.
-
Click Console at the top of the page. Choose Utilities in the menu with the arrow keys and Enter. Then choose System Rescue CD and the default option in the menu that follows.
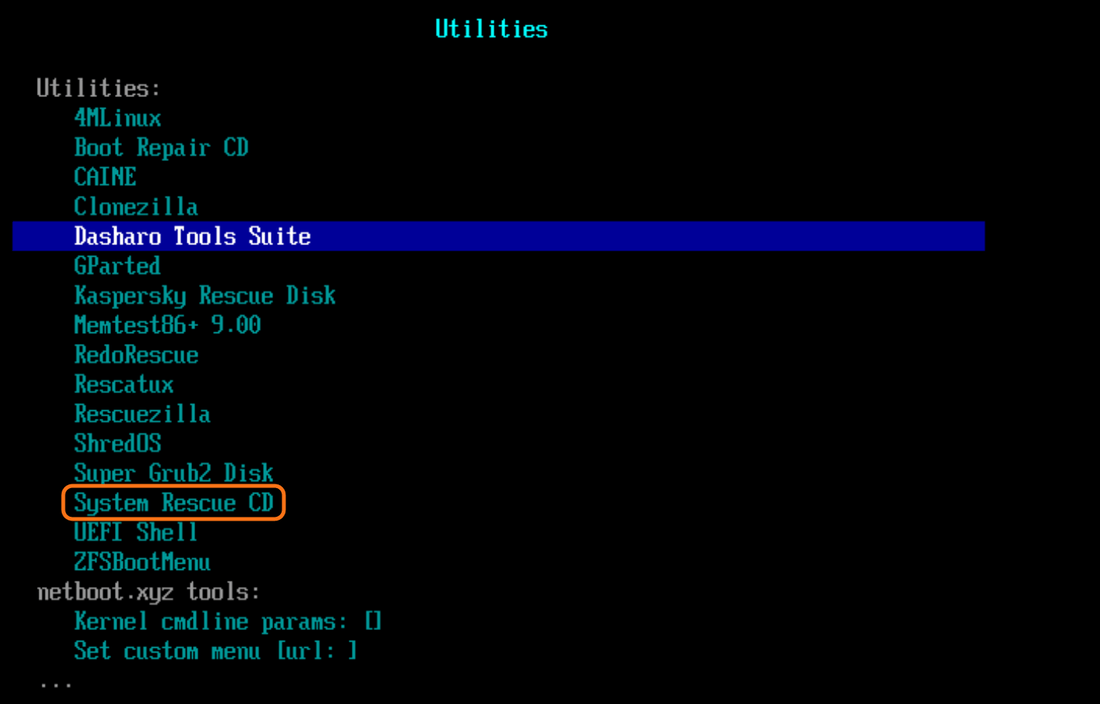
After a moment you are at a command line, logged in as root.
-
Check the disk and the network. Click the paste button at the bottom right of the console, paste the lines and send them.
 lsblkip -4 a
The disk is the line with
diskand the same size as the server’s disk, usuallysda. The server’s address should show ateth0. If it is missing, see Good to know.
Export the disk directly to the new server
Section titled “Export the disk directly to the new server”This is the simplest way. You need no room for a file. Both servers should be at the command line in the rescue system.
-
On the new server, set a root password and stop the rescue system’s firewall.
passwdsystemctl stop iptables -
On the old server, send the disk. Replace the address with the new server’s address. The line overwrites the new server’s whole disk and cannot be undone. You are asked for the password from step 1.
dd if=/dev/sda bs=4M status=progress | gzip -1 | ssh root@203.0.113.20 'gunzip | dd of=/dev/sda bs=4M'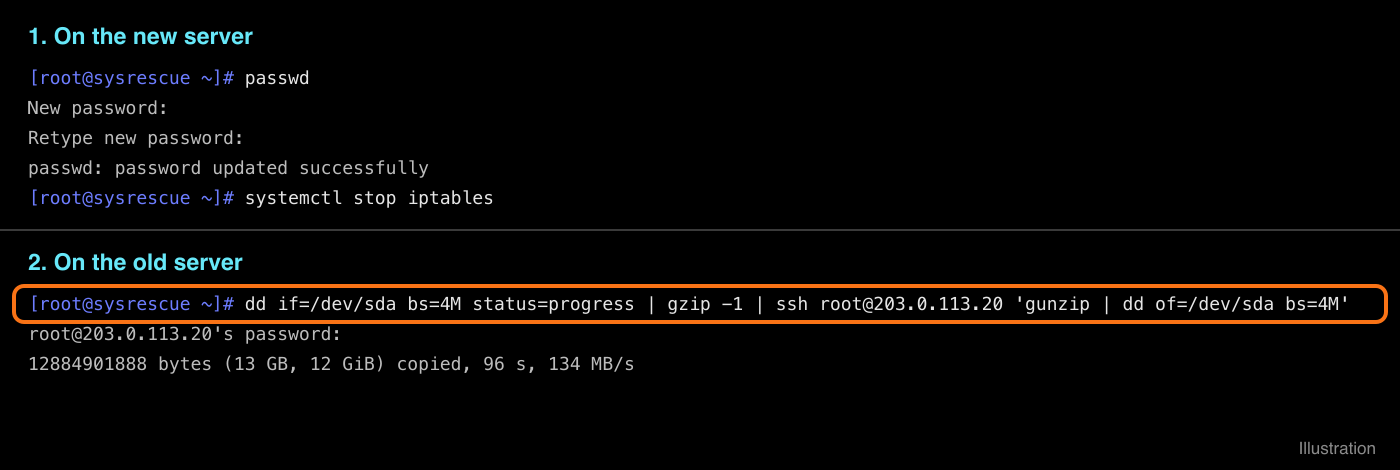
-
You are done when the prompt comes back on the old server. Run
syncon the new server and continue with Start from the new disk.
Export the disk to a file
Section titled “Export the disk to a file”To keep the disk or move it later, send it to a place where you have SSH, for example another server. That place needs room for the whole disk.
dd if=/dev/sda bs=4M status=progress | gzip -1 | ssh root@203.0.113.30 'cat > /root/disk.raw.gz'Import a file
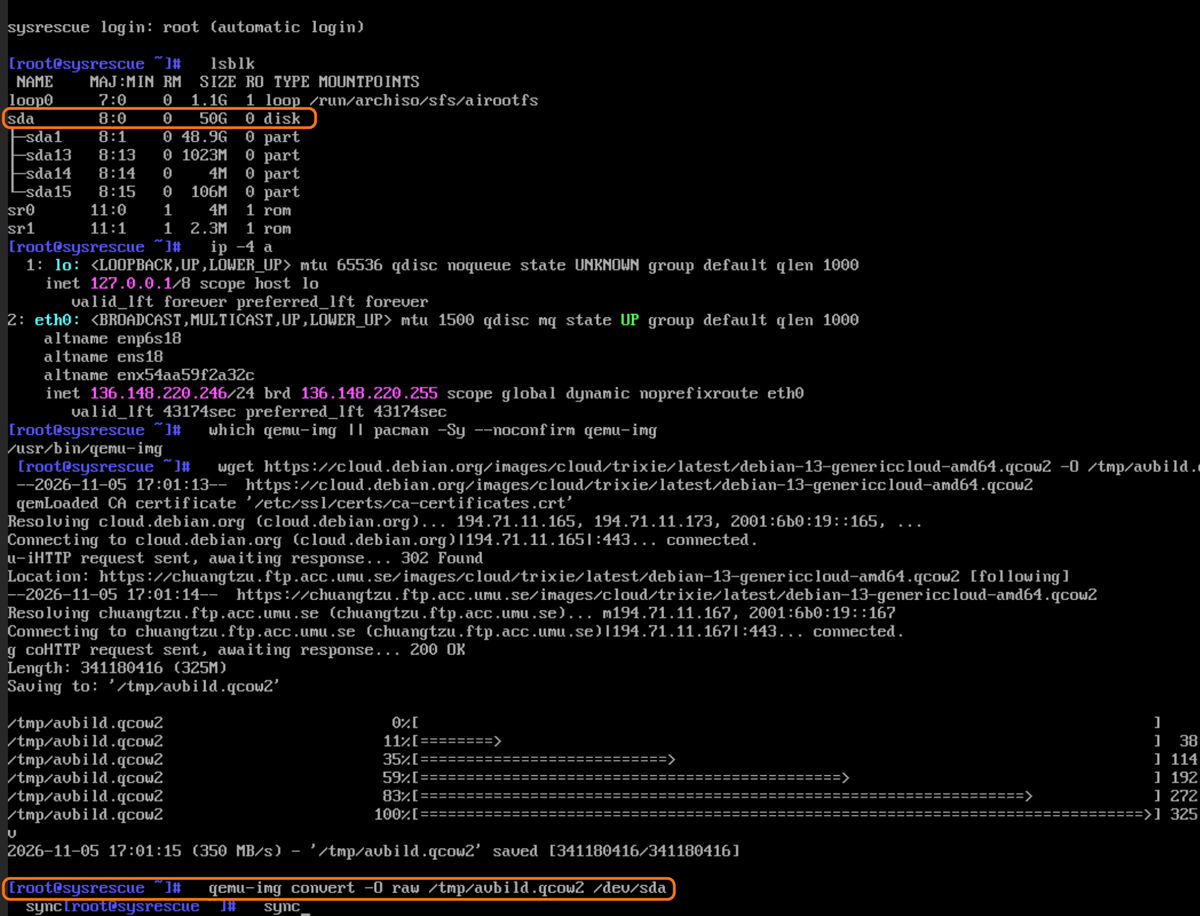
Section titled “Import a file”Put the file on a link that goes directly to the file. A link from WeTransfer and similar services does not work. Paste the lines on the new server. The line with dd or qemu-img overwrites the whole disk and cannot be undone.
A file exported as above:
wget https://your-server.example/disk.raw.gz -O - | gunzip | dd of=/dev/sda bs=4M status=progresssyncA finished image in qcow2, vmdk or vhd:
wget https://your-server.example/image.qcow2 -O /tmp/image.qcow2qemu-img convert -O raw /tmp/image.qcow2 /dev/sdasyncIf the disk has another name than sda, replace /dev/sda with that name. If the last line stays there without running, press Enter. You are done when the prompt comes back.
Start from the new disk
Section titled “Start from the new disk”- Go to the ISO tab and click Unmount.
- Restart the server with Restart.
- Open Console to see the system come up.
What happens next
Section titled “What happens next”- An image with cloud-init gets the server’s address, name and SSH keys by itself.
- A system with a static address keeps the old server’s address and can’t reach the network. Change the address in the console. The address and gateway are on the Network tab.
- If the server does not boot from the disk, change the boot mode. The disk only boots in the mode it was made for. See Change the boot mode of your VPS.
Good to know
Section titled “Good to know”-
Zip file: unpack it with
unzip /tmp/image.zip -d /tmpbefore the line withqemu-img. -
Large qcow2 file: the file sits in the server’s memory while it is written. If it doesn’t fit, convert it to raw on your own computer.
-
No address at eth0: set it by hand with the address and gateway from the Network tab. If netboot.xyz asks for network settings, enter the same details there.
ip addr add 203.0.113.10/24 dev eth0ip route add default via 203.0.113.1echo nameserver 1.1.1.1 > /etc/resolv.conf -
Black screen: live systems with a desktop can show a black screen in the console. System Rescue CD starts in text.
-
Just a new operating system: then you need no disk. See Reinstall your VPS with a new operating system.
-
If you can’t do it yourself: we import an image free of charge. Create a ticket with a direct link to the file.